This article covers how to diagnose and replace a front wheel bearing on a TrailBlazer (or Envoy).
Wheel bearings are a complex and fairly expensive item for a TrailBlazer. They serve to support the vertical weight of the vehicle, transfer lateral turning forces from the wheel to the body, transfer the power from the front CV shaft to the wheel, house the ABS sensor, and still allow the wheel to rotate.
Below you can see the complex inner workings of this assembly. There are actually two tapered roller bearings inside a wheel hub in order to accommodate the different forces on the wheel. Between them is the wheel speed sensor that sends signals to the ABS.
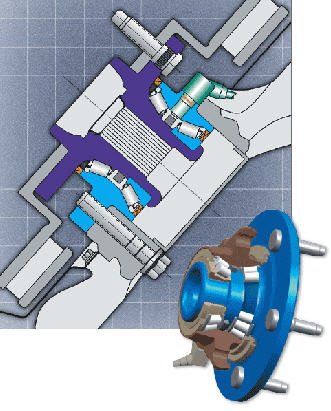
A cutaway and section view of a Timken wheel bearing.
When a wheel bearing fails, it generally does so slowly. The seals are generally the first thing to deteriorate, which allows water and other foreign particles to enter the bearing space. This can lead to accelerated wear or pits in the bearing races. The result is a grinding noise. Eventually the slight fouling of the races leads to wear of the rollers. In time, this gives the hub some freedom to move around.
Diagnose:
To diagnose a wheel bearing, you will generally hear a grinding noise from the front end of the vehicle. As it gets worse, this grinding can be felt in the floorboards. The grinding may be worse at certain speeds. Mine have been worse at around 35 mph, and 70 mph with barely any noise at about 53 mph.
The next step is to determine which side the bad bearing is. Conventional wisdom says to note if the grinding goes away in a turn. The wheel with less weight when the noise goes away is the bad bearing. However, I have not found this to work for me. The best method of identifying the bad bearing is to lift the wheel off the ground and spin it by hand. Listen carefully for any sort of light grinding sound that times with the rotation of the wheel. I have used that method without fail, although the bearing must get some wear before the method works.
When selecting a new bearing, I do not recommend buying one of the cheap ones off eBay. I’ve purchased mine off Rock-Auto. When it comes to the wheels and the safety of your vehicle, don’t trust it to eBay.
Replacement:
Estimated time: 2 hours
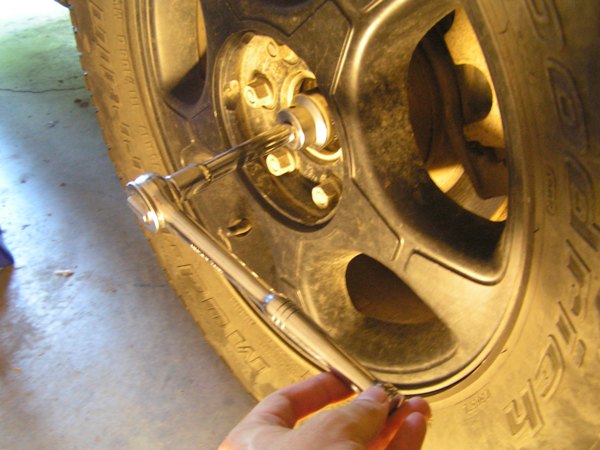
1. Remove axle nut. Requires 35mm deep socket (or possibly 36mm if you have aftermarket CV shafts).
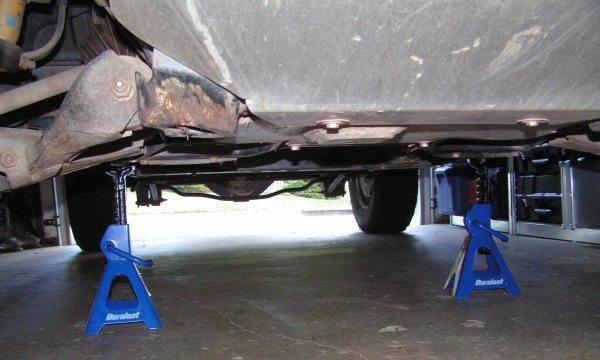
2. Jack up vehicle so the wheel with the bad bearing is off the ground. Properly support the frame with jack stands.
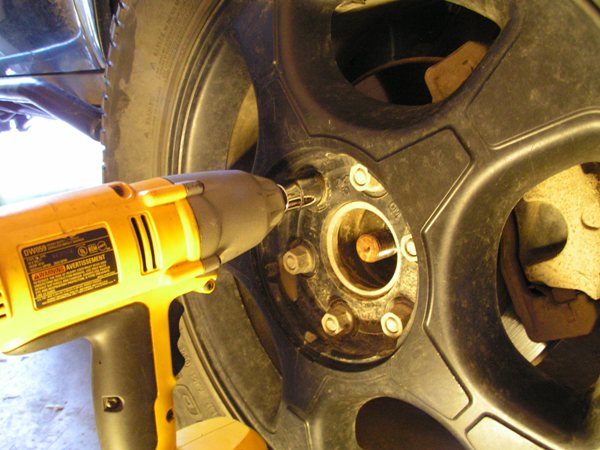
3. Remove wheel.
4. Remove 10mm screws that hold on brake cable. Remove the plastic V clip that holds the wheel speed sensor wire to the bracket.
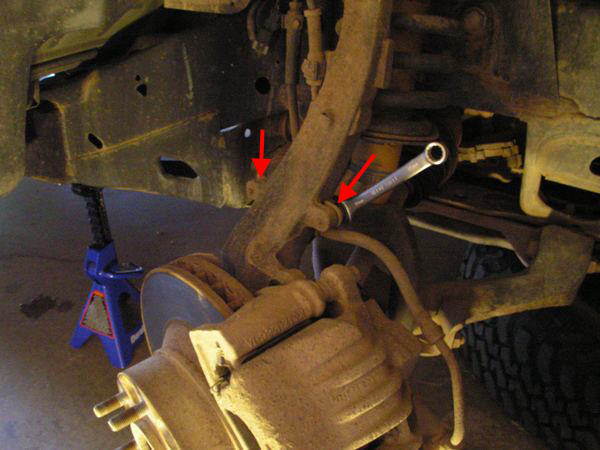
5. Remove the two 18mm screws that hole the brake caliper on. This will take a lot of force to break, you may need a breaker bar. I use a pipe over my ratchet.
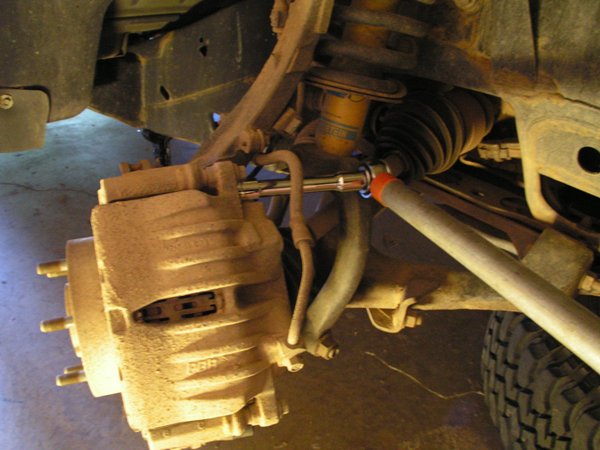
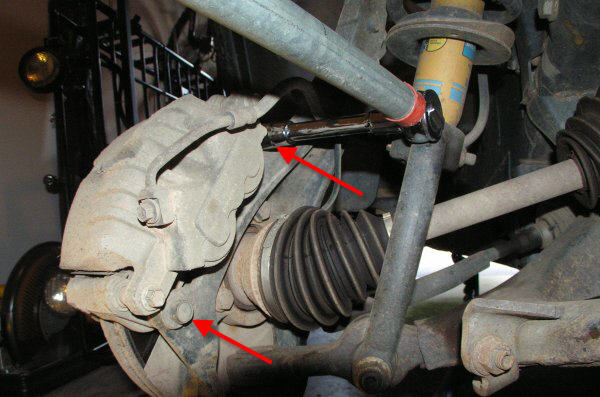
6. Remove the brake calipers from the brake disk. Depending on the wear on your brakes, you may need to use a large C clamp to compress the brake pistons in order to remove it.
Hang the brake caliper from the upper control arm with wire or a coat hanger.
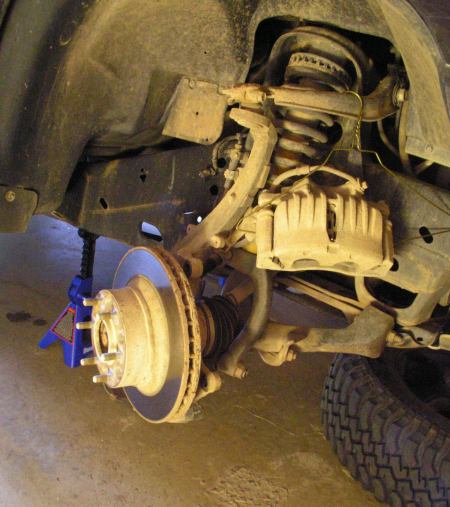
7. Remove the wheel spacer if you have one (I find it easier to use an impact wrench here), and remove the brake disk. My wheel spacer had seized to the hub’s inner bore. If that happens to you, you’ll have to be crafty and find a way to pry on the back of the brake disk.
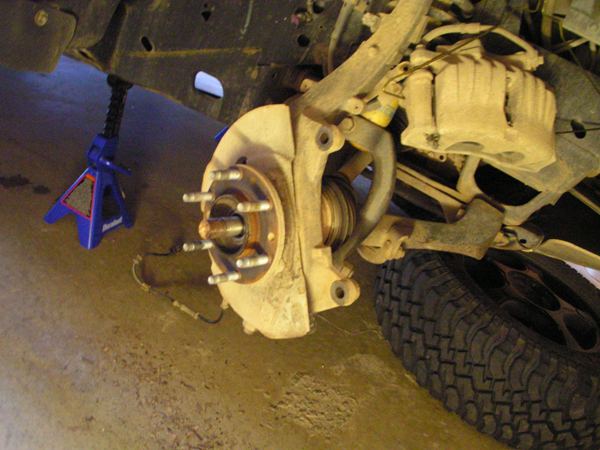
8. Remove the pinch bolt and nut from the upper control arm. This requires two 15mm wrenches.
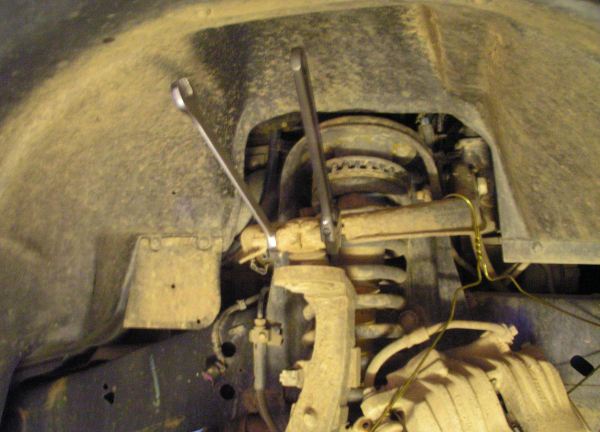
9. Remove the upper ball joint from the upper control arm. Lay the knuckle down so it’s hanging off the lower ball joint. Be careful not to over-extend the CV shaft boots. If you have to, tap the wheel-end of the CV shaft with a hammer to unseat it from the wheel bearing.
10. Remove the three 18mm screws on the back side of the knuckle that hold on the wheel bearing. This is tricky because the knuckle moves. Position your body to hold the knuckle, or have someone help you.
If your wheel bearing doesn’t come out easily, thread a screw back in and tap it with a hammer. It should pop out.
Remove all of the wire clamps from the wheel speed sensor wire and remove it from the plug that’s mounted to the frame. The plug has a gray locking key that you need to remove first.
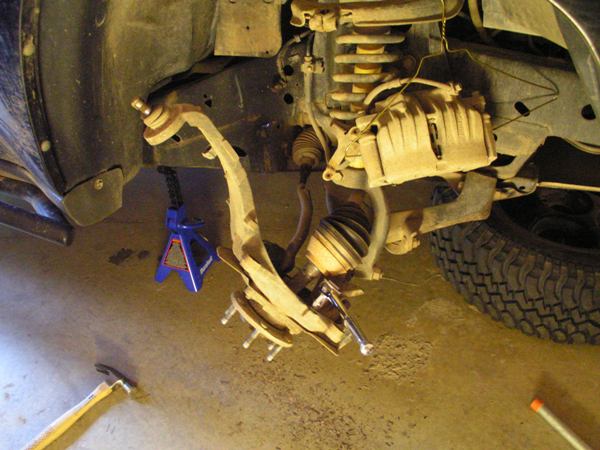
11. Pull the brake shield off the bearing. Mine was corroded on pretty good. Be careful not to bend the brake shield too much; you don’t want it rubbing on your brake disk.
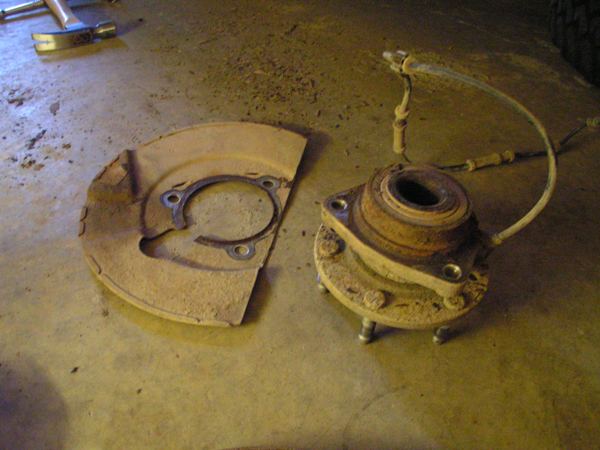
12. Assemble new bearing into knuckle. Remember the brake shield’s prior position. The ABS wire should snake through the hole in the shield.
Be careful not to cross-thread one of the 3 hub bearing screws. They are 18mm and need to be torqued to 105 Nm (77 lb ft). Again, this may require some assistance, but I was able to manage it myself.
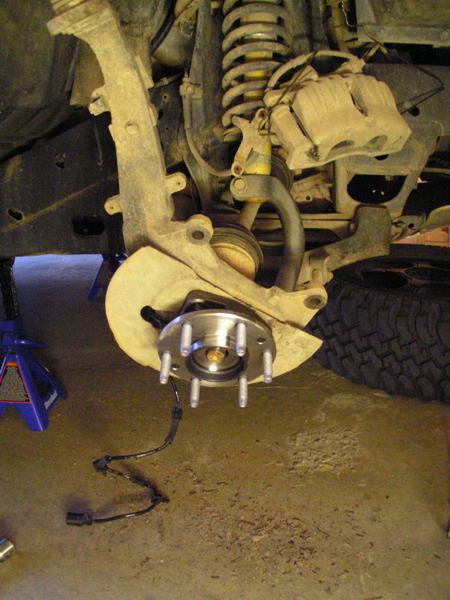
13. Reattach the upper ball joint and reattach the pinch bolt and 15mm nut. Tighten the nut to 40 Nm (30 lb ft).
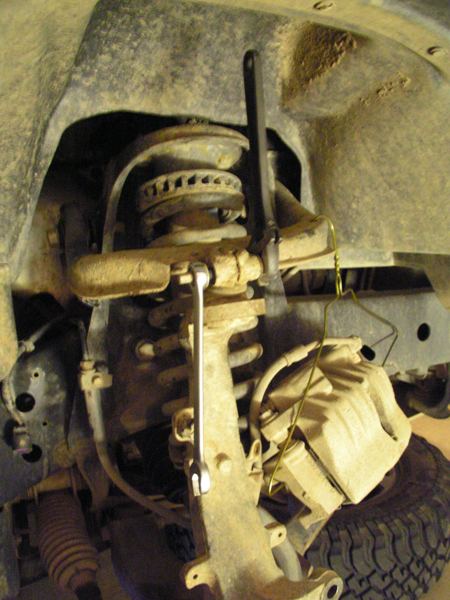
14. Put on the brake disk and (if applicable) wheel spacer.
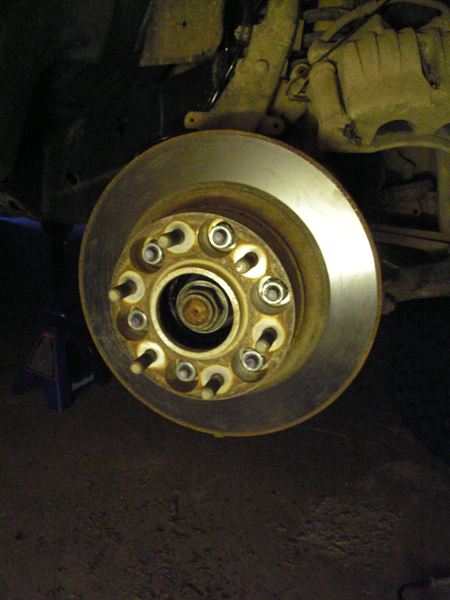
15. Reattach the brake calipers. Two 18mm screws torqued to 180 Nm (133 lb ft).
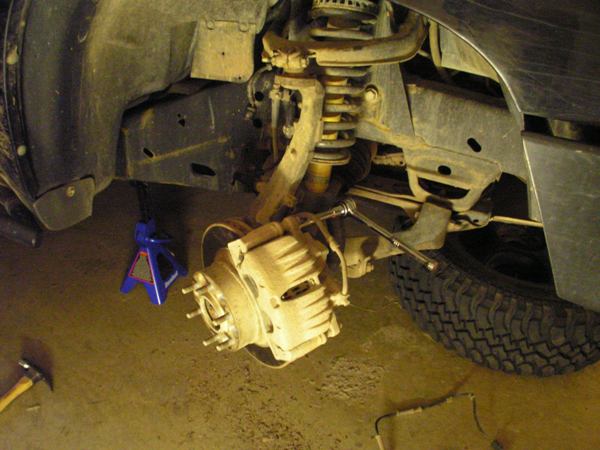
16. Reattach the brake line bracket with the two screws, 10mm.
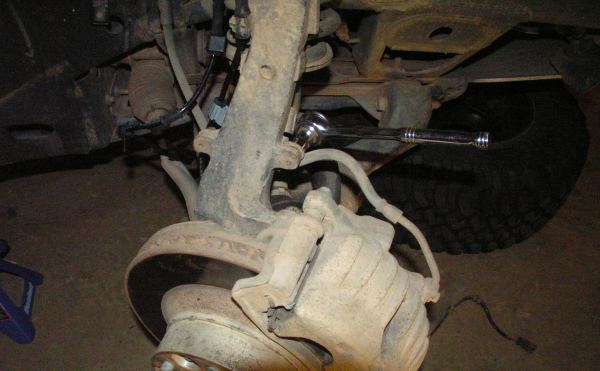
17. Run the wheel speed sensor wire back to the plug. Don’t forget the plug lock.
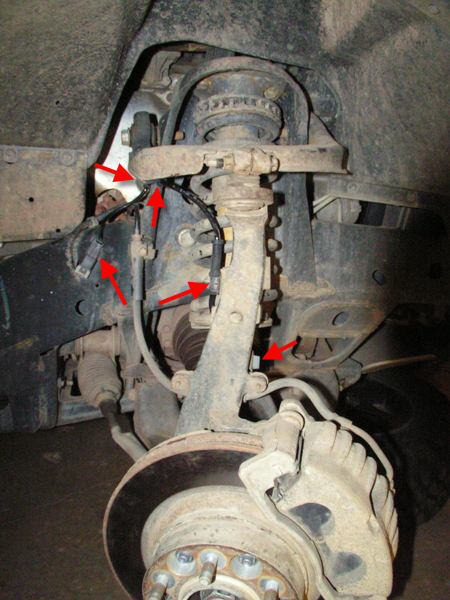
18. Reattach the wheel, drop the vehicle to the ground, and torque the 35mm axle nut to 140 Nm (103 lb ft)
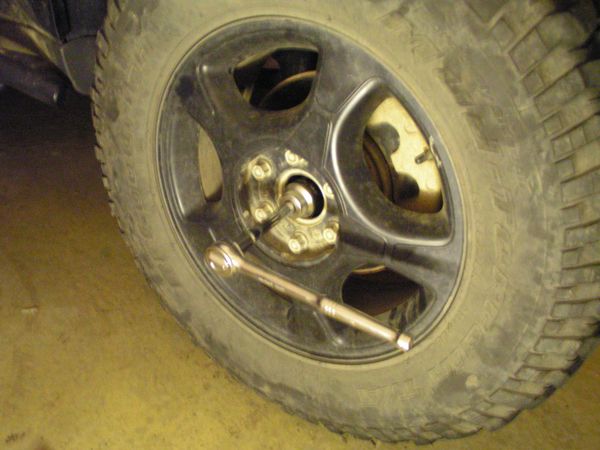
19. Take the vehicle for a slow drive around the block (try to hit a few bumps even) just to make sure everything sounds right before hitting any high speeds.
 2. Jack up vehicle so the wheel with the bad bearing is off the ground. Properly support the frame with jack stands.
 3. Remove wheel.
 4. Remove 10mm screws that hold on brake cable. Remove the plastic V clip that holds the wheel speed sensor wire to the bracket.
 5. Remove the two 18mm screws that hole the brake caliper on. This will take a lot of force to break, you may need a breaker bar. I use a pipe over my ratchet.

 6. Remove the brake calipers from the brake disk. Depending on the wear on your brakes, you may need to use a large C clamp to compress the brake pistons in order to remove it.
Hang the brake caliper from the upper control arm with wire or a coat hanger.
 7. Remove the wheel spacer if you have one (I find it easier to use an impact wrench here), and remove the brake disk. My wheel spacer had seized to the hub’s inner bore. If that happens to you, you’ll have to be crafty and find a way to pry on the back of the brake disk.
 8. Remove the pinch bolt and nut from the upper control arm. This requires two 15mm wrenches.
 9. Remove the upper ball joint from the upper control arm. Lay the knuckle down so it’s hanging off the lower ball joint. Be careful not to over-extend the CV shaft boots. If you have to, tap the wheel-end of the CV shaft with a hammer to unseat it from the wheel bearing.
10. Remove the three 18mm screws on the back side of the knuckle that hold on the wheel bearing. This is tricky because the knuckle moves. Position your body to hold the knuckle, or have someone help you.
If your wheel bearing doesn’t come out easily, thread a screw back in and tap it with a hammer. It should pop out.
Remove all of the wire clamps from the wheel speed sensor wire and remove it from the plug that’s mounted to the frame. The plug has a gray locking key that you need to remove first.
 11. Pull the brake shield off the bearing. Mine was corroded on pretty good. Be careful not to bend the brake shield too much; you don’t want it rubbing on your brake disk.
 12. Assemble new bearing into knuckle. Remember the brake shield’s prior position. The ABS wire should snake through the hole in the shield.
Be careful not to cross-thread one of the 3 hub bearing screws. They are 18mm and need to be torqued to 105 Nm (77 lb ft). Again, this may require some assistance, but I was able to manage it myself.
 13. Reattach the upper ball joint and reattach the pinch bolt and 15mm nut. Tighten the nut to 40 Nm (30 lb ft).
 14. Put on the brake disk and (if applicable) wheel spacer.
 15. Reattach the brake calipers. Two 18mm screws torqued to 180 Nm (133 lb ft).
 16. Reattach the brake line bracket with the two screws, 10mm.
 17. Run the wheel speed sensor wire back to the plug. Don’t forget the plug lock.
 18. Reattach the wheel, drop the vehicle to the ground, and torque the 35mm axle nut to 140 Nm (103 lb ft)
 19. Take the vehicle for a slow drive around the block (try to hit a few bumps even) just to make sure everything sounds right before hitting any high speeds.

